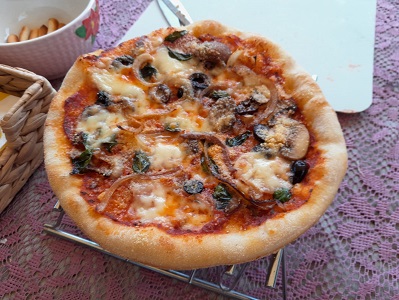
A freshly baked pizza capriccioca with a.o. artichoke.
Essentially, a pizza is a baked flatbread. It traditionally starts with a yeast dough base, which is spread with tomato sauce and sprinkled with cheese. You can then add various toppings like meats, vegetables, and herbs before baking it in a very hot oven.
info
A pizza of 125gr (average 275 to 325 calories) is the equivalent of 2 or 3 sandwiches.
hardware
The most important thing we need is a very high temperature oven, i consider 350°C the minimum.
To replicate the conditions in a wood-fired oven, we need a pizza stone. Furthermore we must ensure that there is enough overhead heat. In a kamado we won't have this. The best option we have is buying a mini pizzaoven. Furthermore an important tool is the pizza peel.
Also a kneading machine or a breadbaking machine can be handy and some other bakery tools like dough scrapers and sealable bowls.
The ideal dough should be very supple and elastic with strong gluten. Therefor a few specific requirements are placed on the flour:
it is made from soft wheat (grano tenero)
super fine and pure ground
a protein content of 12-13%
it has a high strength (W 280 to 350),
If you want more info on flour properties you can read the article about bread baking.
So what flour should we use? The italian 'typo 00' is the best, ofcourse that is what the Italiens say. The lokal mill shop has pizzaflour with 12,8% protein. This will cost you €2.50/kg.
mix flour
By mixing different types of flour, we can obtain the desired properties. And save considerable money.
Example: We can buy "manitoba" with 14.5% or 'nedertarwe' patent with 14% protein. When we mix this with patent flour from the supermarket, we get over 12% protein and very fine grind. And the right strength (w290). This own mix costs €1.28/kg, nearly half the price of the ready-made mix.
THE DOUGH:
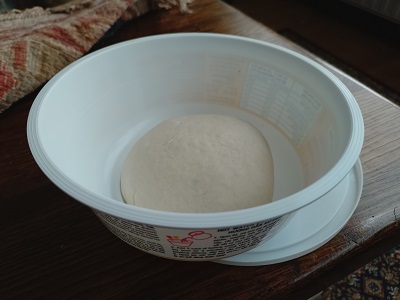
A noodle meal bowl is ideal for one pizzaball.
This topic is covered extensively in my publication on bread baking; look there for all information about dough.
Important: Always cover dough as it dries out very quickly.
The main ingredients are water and flour. Their ratio depends on various factors: How much water can the flour absorb, what product we want to bake and at what temperature.
The other ingredients are yeast and salt. No olive oil is allowed in the traditional pizza dough, this would burn when we bake this on a high temperature. So only when baked at lower temperatures you can use some olive oil to taste.
hydration
Hydration is the weight ratio of flour to water. 100 grams of flour with 60 grams (ml) of water gives 60% hydration. The more proteine in the flour, the higher the hydration can be to obtain a fine elastic dough. For a pizza we like to have a dough that is easy to handle (not sticky) so that we can easily knead it and form it into a nice base. But as much water as it can absorb. Moreover the hydration has an impact on the baking result. It takes more time to evaporate water in the oven.
I use this rule of tumb:
11.5% - 12.5% proteine: 60 to 63% water
12.5 - 13% proteine: 65% water
13 - 14 proteine: 68 to 70% water
Less easy to get a ball out unscathed in this way.
So when we use the flour with 12.8% we can target a hydration of 65%. When we use our own mix of "nedertarwe" with "aldi patentbloem", we go to 62% hydration. The ingredients for the dough (2 pizzas of 250 gram or 4 smaller ones of 125 gram each) are:
300 gram flour with 12,8 proteine
tapwater (cold for long rise) for:
hydration 60%: 180 gram
hydration 62.5%: 188 gram
hydration 65%: 195 gram
2.5% = 7.5 gram fine seasalt (1/2 teaspoon)
Yeast
short rise 1% - 1.5% dry yeast (1/2 teaspoon) 3 a 6 gram
You can do this in different ways. My method is as follows: I put the flour, majority of the water and the yeast in a bowl. I stir this with a spoon until the water is absorbed. Now i add the salt and the rest of the water and stir again.
TIP: It is always smart not to pour all the water in at once. Even when you think more is needed it can easely be too much. You can always add more later if needed.
kneading the dough
After the mixing we should have a dough that is not (too) sticky on the hands. Now we can start the kneading, which is a very important step. It converts the proteins into a very elastic and strong network of gluten. A good dough can retain gas produced by the yeast.
This normally takes 10 minutes. We can use the dough program of the bread baking machine to do this.
target temperature
If you want to apply a long rise, you want a dough temperature of around 24°C. (not over 26) after kneading. This is why we start with cold water and sometimes even icewater. This should prevent the yeast become active too fast. If you feel that during kneading this temperature is reached, you can interrupt the kneading and put the dough (covered) in the fridge to cool down. Sometimes this is even better for a quality dough.
the rise
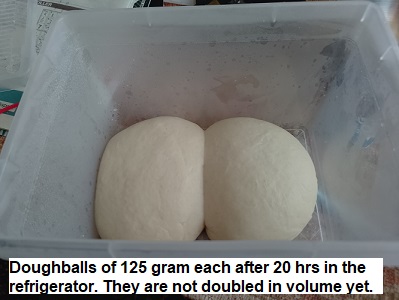
For the best result we put the dough 24 hrs in the refrigerator. During this period enzymes have time to convert starch into sugar, This would result in a better taste and color and a lighter baked-up texture. Also the gluten will have the time to relax so that the dough will be easyer to stretch and form the bottom.
refrigerate
After kneading let the dough rest 30 minutes. Now form it into a balls (for each pizza one ball), this is an important step as these balls form the starting point for the pizza base. Put the balls in a lightly greased foodcontainer where they have enough space to prevent them from 'growing together', cover and refrigerate for 24 hours.
The next day, remove from the fridge, and let sit for at least 2 hrs. to get them on room temperature. Then move on to the next step, forming the bottom.
remark
Since we can only bake small pizza's, with this amount of dough i have to make 8 balls insteat of 4. For a pizzastone with diam. 20 cm I use 125 grams dough per pizza.
pre ferment
biga, a very dry pre-ferment.
A few notes on using a pre ferment. This extends the total fermentation time with an extra 24 hrs. The fermentation now gets some properties of sourdough. This improves our pizzadough with better taste, more airy crust, and better gluten.
biga
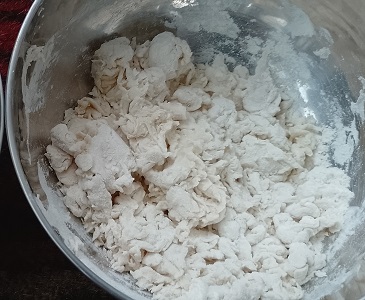
In Italy the used preferment for pizza is called 'biga', this is a crumbly mixture of 100% flour and 50% water.
It is kept 24hr on a cold roomtemperature (16°C) or a few hours on a normal roomtemperature and then in the refrigerator.
Incorporate in dough
Doing this by hand can be a tricky task because the biga is dry and tough. One way is to tear the biga into small pieces and let them soak in the rest of the required water. After 5 minutes, you can try to break up the lumps with a potato masher or squeezing them with hands. If you get a milky porridge without lumbs you can mix the biga with the remaining flour (if any), and finally the salt. Now you can start kneading.
planning with pre ferment
Assume you want a dough with 500gr. flour and 310gr. water (62% hydration).
The easy way; take 200 gr of the flour and mix this with 100gr water.
The hard way; When you have a kneading machine, you can mix all the flour with 250gr water.
This planning is for the easy way:
day 1: mix 200 gr flour and 100gr water (don't knead) to a lumpy mass and let it sit for 24 hrs at 16°C.
day 2: Mix the dough with biga, the remaining 300grams flour and the majority of the remains of the water 210gr. Finally add salt (dissolved in the remaining water) and knead 10 minutes, let it rest an hour, form pizza balls and put these in the refigerator.
day 3: At least 2 or 3 hours before use remove the doughballs from the refrigerator.
THE BOTTOM
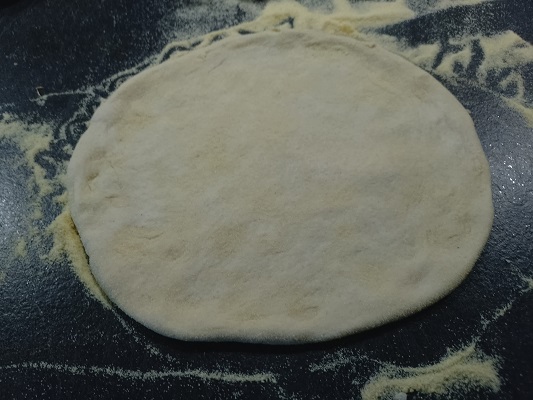
A stretched pizzabottom. A little too much of the rim was touched here.
For stretching the bottom we use a flour called semola to prevent the dough sticking to the counter or pizza peel. Semola is made from hard weat (Semola di grano duro rimacinata). Why do we use this:
The perfect grain: Semola (often referred to as rimacinata, meaning 're-milled') is fine enough not to feel like sand between your teeth, but coarse enough to form a rolling layer under your dough.
The "ball bearing effect": The hard structure absorbs moisture from your dough less quickly than regular all-purpose flour. As a result, the dough floats on the work surface (like ball bearings) and does not stick to your pizza peel.
No bitter taste: Regular flour burns instantly in a hot oven or pizza oven and gives a black, bitter taste. Semolina can withstand the heat much better and ensures a delicious, golden brown, and crispy crust (crunch).
We prepare our counter by dusting it with semola an we make a small pile of semola at the side of the workspace.
forming the bottom
Carefully remove the dough ball from the container without disturbing the shape. When the ball has an individual container this is easy, simply flip it over on the semola pile. If the shape is not circular we can correct that with our hands.
Now press the base flat with your fingers without pressing the air out of the edges. Flip over and repeat in the opposite direction. Then strech the bottom to the desired size. When done, put the dough on one hand and remove the semola. The other hand wipes away the semola to the side of the workspace. Now we can spread our bottom on the counter to top it. There are different ways to stretch the bottom, google for the correct technique to do this.
TOPPING
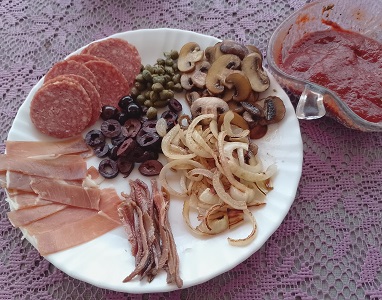
prepared ingredients for the topping.
There are various styles regarding the topping of pizzas. Here, we limit ourselves to the Napolitan style.
The Napolitan style is shabbily topped with cheap ingredients and olive oil. I remember my first holiday in Italy, the pizza's with minimal topping but very tastefull. So the mantra is: more is less. The main ingredients are pizza sauce and cheese.
base sauce
The base sauce is made from strained tomatoes (pommodori passato) with some salt, possibly enriched with some herbs like oregano, garlick, basilicum. For small amounts we can use a can of tomato paste and add some water and flavours. This way we dont have to throw away the leftovers of our precious pizza sauce.
Of course, you can also make it yourself from well-drained fresh, peeled tomatoes.
the cheese
The favorite is mozarella while this melts perfectly over the pizza. However cheeses like parmesan or whatever other you like are possible. Make sure the mozarella is completely drained or you will end up with a liquid topping.
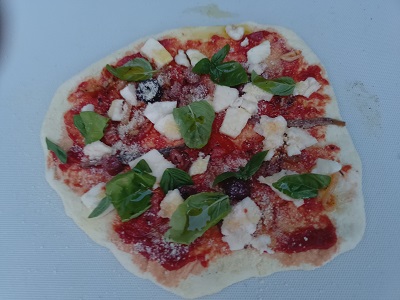
Let's start with a very basic napolitan pizza, the margherita. This pizza is only topped with a pizza sauce and some mozarella, basil and olive oil.
The pizzasaus is made from strained tomatoes (pommodori passato) with some salt, optional some black peper. The mozarella is drained and torn into pieces.
variations
To taste you can add other ingredients but you need to consider that they may add moist to the topping. For example, slices of mushrooms are better heated briefly first so that they lose their moisture.
a pimped margherita before baking.
Some other classic pizza's are:
napolitana, a variation of margherita with anchovies, capers or olives.
marinara: tomato sauce, garlic, oregano, and olive oil (no cheese).
pizza funghi: Tomato sauce, mozzarella, and sliced mushrooms.
Capricciosa: Tomato sauce, mozzarella, cooked ham, mushrooms, artichokes, and black olives.
Quattro Formaggi: Mozzarella, gorgonzola, and other regional cheeses like parmesan or pecorino.
Quattro staggione: Tomato sauce, mozzarella, split into four sections with ham, mushrooms, artichokes, and olives
The baking
We assume that we can bake the pizza in a real pizzaoven at a temperature of more than 400°C.
form the bottom
We formed a disk with a thicker airy rim. The rim prevents the pizza topping from dripping off onto the pizza stone. You really don't want this, because it will burn on the stone.
Add the topping
It is important to work quickly, otherwise the dough may become too soft to handle. So be sure that you have the ingredients ready and within easy reach.
Start with a very simple pizza margherita
Put one dinner spoon base sauce on the bottom and spread out evenly with the back of the spoon (don't touch the rim).
Distribute the slices of mozarella on this.
add some basil and olive oil.
Scoop the pizza and place it on the pizza stone.
To ensure even baking, you can rotate the pizza 90 degrees after 50 seconds.
after 1.5 minute our pizza should be ready.
Tip
It can be helpful to place the pizzabottom on the pizza peel first, and then add the topping.