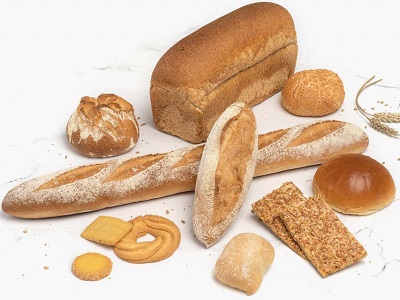
This is a general article about bread baking in all its forms. It covers the flour, the dough, and the baking.
supplies
The most important thing we need is an oven. Depending on the type of bread, we sometimes need very high temperatures, e.g. 350°C for pizza.
The other hardware we need are:
dough scraper/cutter
a workspace to kneat the dough
kitchen scale
optional a bread baking machine to make the dough
FLOUR
The most important ingredient in bread. Flour has properties that are important to the result of the baking:
type of weat, soft or hard (durum)
ground and filtering
proteine content
strength (W value)
the wheat
Usually soft wheat is used for bread, it ensures supple gluten that yields an elastic dough. Hard weat is more suitable for making pasta.
the grind
We distinguish all kinds of variations of milling and the filtering of the husks. The finest flour contains only flour and no other parts of the grain. (patentflour). Other types contain almost all the fibers of the grain kernel, e.g. coarse whole wheat flour. The last type is better for your health.
protein
The flour contains protein that helps to absorb water. The more protein, the heigher possible hydration and the more extensible.
strength
Strength is expressed in the 'w' value. It reflects the flour's capacity to absorb water, build a tight gluten network, and trap gas during long fermentation without collapsing. Strong flour absorbs plenty of water and holds up under long rising.
The w-value is not always shown on the label of the flour. a rule of thumb is that the strength is related to the protein:
13-15% proteine W-value W270 to W350+ very strong
11-12.5% proteine W-value W180 to W260 moderate strong
9-10.5% proteine W-value W130 to W170 low strength
what flour to use
Below some different types of bread and the requirements placed on the flour.
plain white bread: Type: patentflour, american patent. Protein 12 - 13%, W240 - W270. Feature: Strong enough to push the heavy structure up nicely in a baking tin.
brown bread: Type: Whole wheat flour mixed with strong flour. Protein 13 - 15%, W270 - W300. Characteristic: High protein is necessary because the sharp fibers (bran) cut through the gluten network.
pizza: Type: typo 00 or strong patentflour. Protein 12.5%, W280 - W320. Feature: Extremely elastic, does not tear when stretched thinly
Baquette: Type: French T55 T65. Proteine 11.5 - 12%, W200 - W230. Characteristic: Medium strength; produces a crispy crust and large, irregular holes.
focaccia ciabatta: Type: Tipo 0 or strong all-purpose flour (sometimes + Manitoba). Protein 13 - 14%, W300 - W350. Characteristic: Extremely high gluten strength to absorb a large amount of water (75%+ hydration)
brioche: Type: manitoba or french t45 Gruau. Protein 11 - 12%, W320 - W380. Characteristic: A very high W-value is crucial to support the heavy weight of butter, sugar, and eggs without collapsing.
coockies and cake ordinary patentflour with 10% W150
Characteristic: no gluten necessary (no rising) for pattiserie.
mixing your own
By mixing different types of flour, we can adjust the properties to our needs. Some examples:
1 part "manitoba" and one part patentflour from the supermarket will give us a perfect pizzaflour with W300 and protein 12,25% costs €1.68
1 part "nedertarwe" and one part patentflour from the supermarket will give us a perfect pizzaflour with W300 and protein 12,25% cost €1.28
1 part "super patentbloem" and one part patentflour from the supermarket will give us a perfect pizzaflour with W300 and protein 12% cost €1.28
PRE-FERMENT:
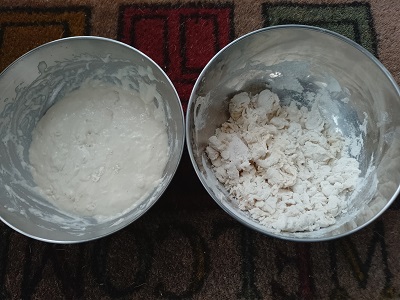
pre-ferments poolish (left) and biga.
Professional bakers often use a pre-ferment or sponge. This has the following advantages:
More flavor: The yeasts and bacteria have extra time to produce acids and aromas.
Better structure: The dough develops a nicer, airier crumb with larger holes.
Longer shelf life: The bread stays fresh longer after baking and dries out less quickly.
Stronger dough: The gluten develops better during the long resting period.
Less yeast needed: Due to the long maturation, the yeast multiplies naturally.
There are different kind of pre-ferments, each has its own area of application, some of them are:
classic sponge
This is the simplest form. The flower is placed in a bowl. In the middle we make a smal hole in which we put the yeast and some of the water. We stir this with some flour from the sides until we have e thin porridge. This is left alone for 20 minutes.
poolish
This is invented in Polen, it actually makes for a milder, yogurt-like and sweeter taste. Poolish is a liquid sponge (equal parts flour and water) with the total amount of yeast that is needed in the final dough. Often rises for 12 to 24 hours at room temperature. Or after one hour we put it in the refrigerator. Typical of French baguettes.
Biga
A very firm, dry dough starter from Italy. A biga produces more acetic acid. This gives the bread a deep, slightly sour, and nutty flavor. It strengthens the gluten and produces a large, open hole structure.
Often rises for 12 to 24 hours at cool room temperature 16-18°C. Or after 3 hours at higer temperature in summer, we put it in the refrigerator.
Perfect for ciabatta and pizza.
Pate Fermentee (Stale dough)
A piece of dough left over from the previous batch of bread. Store this in the refrigerator and knead it into your new dough.
poolish calculation
Example: We are planning a dough that contains 300 gr flour and 180 gr water. If we make a poolish of about 1/3 of the dough, we can take 100 gr water and 100 gr flour. We mix this with the yeast (0.5 gram). We keep this liquid mixture at roomtemperature for 1 hour and then put it in the refrigerator. After 24 hrs we add the remain of the flour (200gr), the remain of the water (80 gr.) and the salt.
DOUGH INGREDIENTS:
The main ingredients are water and flour. Their ratio depends on various factors: How much water can the flour absorb, what product we want to bake and at what temperature.
The other ingredients are yeast, salt and optional fat. For calculations: all other ingredients weigh a percentage of the flour weight.
hydration
Hydration is the weight ratio of flour to water. 100 grams of flour with 60 grams (ml) of water gives 60% hydration. The more proteine in the flour, the higher the hydration can be to obtain a fine elastic dough. Moreover the hydration has an impact on the baking result. It takes more time to evaporate water in the oven.
yeast
We can use fresh yeast or dry yeast. For our home bakery, dried yeast is the most practical. The amount of dry yeast is a percentage of the flour weight. For various driving strategies, we apply the following:
Short rise: we use 1 to 1.5% yeast
Long rise (24 - 48hrs) 0.1 - 0.2%.
Example: If we make a pizzadough with 300gr flour, we use 0.3 to 0.6 gram dry yeast. This is a tiny pinch, but enough for a 24 hrs risetime.
salt
The amount of salt in the dough is a percentage of the flour weight. Usually this is 1.8 - 2.5% for bread. For pizza (2.5) and brioche 2.8 you would target to high salted.
fat
We can add fat (such as olive oil, unsalted butter, lard, or sunflower oil) to dough to completely change the structure, taste, and shelf life of the bread. This is what it does:
It makes the dough softer and more tender.
The bread stays fresh much longer.
Flavor carrier and crispy crust. Fat is a carrier of flavorings.
Better volume with heavy dough
Important: Do not add fat at the beginning of dough preparation, preferably at the end because it works against the quality of the gluten.
bread improvers
There are all kinds of substances that we can add to the dough. They can improve the rising, enhance flavor, color or shelf live. To mention a few:
malt powder: supplies only sugar, aromatic substances, and a dark color to the dough. Diastatic malt flour supplies sugar and especially enzymes (amylase) to a dough.
Ascorbic acid (E300): Vitamin C. Strengthens the gluten. Ensures a light, taller loaf.
Enzymes: Amylase helps the yeast to convert starch to sugar.
Gluten powder: Improves the gluten for a more stretchable dough.
Emulgator: improves the dissolution of fat in the dough (shelf life).
Sugar: dextrose, honey, improves rising and color of the crust.
Mixtures: Available specifically for certain breads, e.g. currant bread.
THE RISE
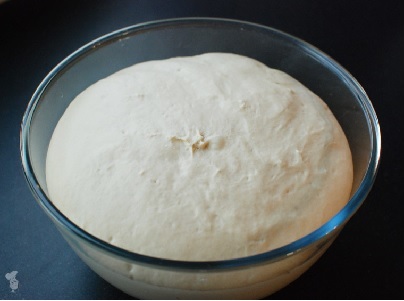
the dough after rising for a few hours.
We allow bread dough to ferment (rise) for three crucial reasons: to create volume and airiness, to develop flavor and aroma, and to strengthen the dough structure. During fermentation, microorganisms (such as yeast cells or lactic acid bacteria) convert the sugars and starch present in the flour into other substances. This biological process is called fermentation. These are the main functions of fermentation:
Volume and an airy structure. When the yeast consumes the sugars, it produces carbon dioxide (CO?) and alcohol. The gas formed creates thousands of tiny air bubbles in the dough. Because the dough is elastic, these bubbles stretch, causing the dough to double in volume. During baking, the alcohol evaporates and the gas expands even further, resulting in a soft and airy loaf. Without this process, the result would be a hard, flat, and compact lump of dough.
Flavor and aroma development. Yeast not only produces gas but also leaves behind organic acids, alcohols, and esters in the dough. These by-products give bread its characteristic, full bread flavor and delicious aroma.
Short fermentation: Results in a relatively neutral or mild taste.
Slow/long fermentation: Produces more complex aromas. For example, in sourdough bread, the acids create a mild, yogurt-like or, conversely, a sharper, vinegary taste.
Strengthening and softening of the dough:
Kneading the dough creates a network of gluten (proteins). The gas produced by the yeast gently pushes against these gluten strands from the inside. This causes the gluten network to stretch and become more flexible without tearing. As a result, the dough can hold air bubbles well and the bread does not collapse in the oven.
Better digestibility
During longer fermentation, the yeast cells and enzymes partially break down certain substances in the flour, such as complex carbohydrates and phytic acid. This makes the final bread easier to digest for our stomach and intestines, and ensures that our body can absorb minerals better.
We can have a short rise (several hrs) or a long rise, >24hrs.
Short rise
We start with lukewarm water and the dough is ready to bake within several hours. It creates a very uniform, fine, and compact structure with lots of small, uniform air bubbles. The taste is mild, neutral, and sometimes recognizable as a 'yeast-like' flavor. There is simply no time for the development of complex flavorings.
long rise
Creates a looser, wilder structure with both large and small holes (like a French baguette or ciabatta). The crust often becomes crispier and develops nicer bubbles after baking.
The flavor is much deeper, fuller, and more complex. Bacteria in the dough have time to produce lactic and acetic acids. This results in a rich aroma and (in the case of sourdough) that typical, slightly Rinse taste.
A long fermentation process also results in a longer shelf life, better digestibility, and better dough handling.
sourdough
With sourdough, we allow natural yeasts and other microorganisms to go about their business spontaneously. The result is a somewhat less airy bread with a typical sour taste.
yeast
By adding cultured yeast, this yeast immediately becomes the dominant micro-organism in the dough. The rising process is much faster, preventing the development of lactic acid.
A long rise combines both sourdough and yeast somewhat.
THE KNEADING
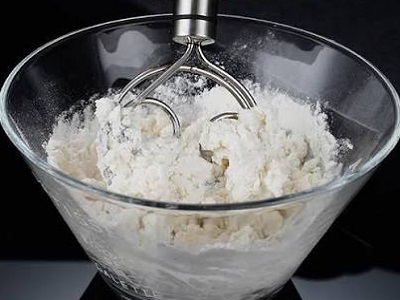
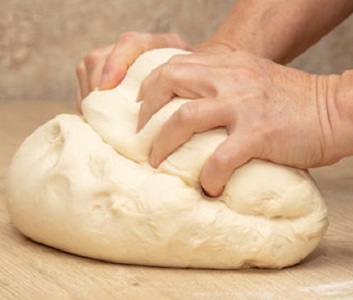
kneading the dough.
Dough preparation involves combining the ingredients in the correct order. The temperature of the water is important. For a short rise with plenty of yeast, we start with lukewarm water. For a long rise we start with (very) cold water because we want a temperature of 22 - 24°C after kneading.
target temperature long rise
If we want a long rise, our dough should have a temperature of ideally 22 to 24°C. after kneading. This prevents the rising starting too quickly and prevents the yeast from stopping too quickly, which would cause the rising process to stall.
We can use the 60- formula: 60 minus (Ambient temperature + Flower temperature) = Your ideal water temperature.
target temperature short rise
After kneading our dough should have a temperature of ideally 26 to 28°C. So here we start with lukewarm water.
mixing the dough
We put the flour, yeast and most of the water in a bowl, and stir this with a spoon. When it is beginning to look like dough, put the salt in and the rest of the water.
kneading
After mixing we should have a mass that is not (too) sticky on the hands. Now we can start the kneading, which is a very important step. During kneating the dough is streched and fold so that oxigen enters the dough and the temperature is rising. It converts the proteins into a very elastic and strong network of gluten. Now the dough can retain gas produced by the yeast.
This normally takes 10 minutes. We can use the dough program of the bread baking machine to do this. Beware that this can add more warmth to the dough.
window pane test
We can test whether the dough has been kneaded sufficiently. Take a small piece of dough the size of a ping-pong ball. Gently pull it apart with your fingers. Well kneaded: You can stretch the dough so thin that the membrane becomes translucent without it tearing. Not kneaded enough: The dough tears off quickly and immediately. You need to continue for a few more minutes.
the long rise (pizza)
For the best result for a pizza, now form balls (google) for each pizza and put them 24 hrs in the refrigerator. During this period enzymes have time to convert starch into sugar, This would result in a better taste and color and a lighter baked-up texture. Also the gluten will have the time to relax so that the dough will be easyer to stretch to form the bottom. Please note: Be sure that the dough has the right temperature then.
a short rise (bread)
The short rise consists of 3 phases.
Phase 1: The Pre-ferment (Bulk ferment) in a bowl. Immediately after kneading, shape the dough into a ball. Place it in a lightly greased bowl, cover it, and let it rise for 60 to 90 minutes at room temperature (until it has doubled in volume).
Phase 2: The Ball Rest (Intermediate Proof) On the Counter.
Carefully turn the risen dough out onto the counter. Gently press out the large air bubbles (degassing) and loosely shape the dough into a ball. Leave this open on the counter for 15 to 20 minutes (covered with a tea towel or plastic wrap).
Why? Due to degassing and shaping, the gluten immediately goes under stress and the dough becomes very stiff. This short rest ensures that the gluten relaxes again. As a result, you can then roll the dough up tightly very easily without it tearing.
Phase 3: The Final Proof in the bread tin
Only now is it time for the bread tin. Roll the relaxed ball of dough tightly into a sheet and roll it up firmly into a cylinder (the dough roll). Place this roll seam-side down in the greased bread tin. Cover the tin and let the dough rise again for 45 to 60 minutes, until the dough begins to bulge nicely over the edge of the tin.
Why? This is the final sprint. The dough roll is now developing the final, fine structure that creates the typical, sleek shape of a casino bread or government bread. From here, it goes straight into the hot oven.
Depending on the kind of bread we want, there are other ways to handle the dough in phase 3. We can use a proofing basket, for example. Or for pistolettes we form small balls in fase 2 etc. etc.
BAKING
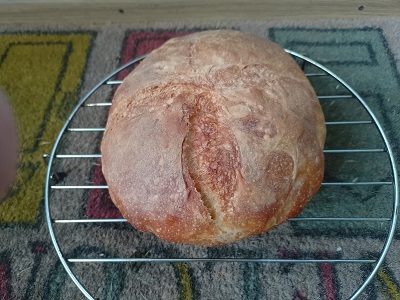
a freshly baked bread, from nedertarwe with 70% hydration.
When the dough has finally risen and has the shape we want, it is time to start baking. Important is that during the first half of the baking, we need steam in the oven to prevent the skin of the bread to dry out. When we bake in a dutch oven or similar, the steam comes out of the bread and cannot escape.
The baking process depends on the type of oven we use.
hot air (convection) oven. This is an enemy of a thin crust. The moving hot air dries out the skin immediately.By putting the temperature 20°C lower we can prevent this somewhat. Or create steam in the oven: Put an empty baking tin below in the oven and after preheat and putting your bread in, pour a cup of water in the baking tin and close up immediately. Better: use a dutch oven that retains the steam.
classic top and bottom heat: if you can turn off the convection setting and choose classic top and bottom heat? Then always use that setting for your bread, pizza, and rolls. Always put steam in the oven the first half of the baking time.
high temperature (pizza) oven. Here too, it is important that there is steam in the oven. We bake pistolettes on the pizzastone at 220°C. Best is to have an cast-iron little pot on the plate setter in which we can pour water.
brushing
Spray or brush water onto the dough for a crispy crust.
Milk or cream: This ensures a soft crust and a brown color. Egg white or beaten egg: This gives a beautiful shine and sticks toppings well. Butter or oil: Makes the crust softer and richer in flavor.
topping
To taste, we can garnish the bread with, for example, egg yolk and seeds. Beat an egg (yolk) with a drop of water or milk and brush the bread with it. Sprinkle the seeds on top and press down lightly.
incisions (scores)
In the oven, the inside of the bread will expand, causing the crust to crack open. To determine where this happens, we create weak spots in the crust by making shallow incisions. This way we have control over the elegance of the shape.
baking tin
If we bake in a container, a metal tin is preferred. When we use a heavy container, this warmes up too slow in the oven. This causes the dough to stick to the container. You need baking paper then.